

A spoon is one of the most useful things you can make from a stick of wood, and one of the most forgiving. You do not need a workshop, a bench vice or a set of expensive tools. A knife, a hook knife and a spare afternoon will do it. The first one will probably be lumpy. That does not matter. What you are learning is how timber behaves, how a blade moves when you push rather than force it, and how to keep your fingers out of the way while it happens. Everything else follows.
Start with the timber, not the tools
Wood choice matters more than knife choice on a first spoon. Freshly cut — green — timber carves like cheese and takes a fine finish straight off the blade. Kiln-dried boards are perfectly workable but noticeably harder, and they will fight you a little.
Good species to look for include birch, lime, alder, willow, sycamore, cherry and apple. Orchard prunings are ideal: fruitwoods are dense, close-grained and lovely to work, and you are doing someone a favour by taking a branch off their hands. Steer clear of anything knotty, split or twisted. Resinous softwoods such as pine are a poor choice — they tear, clog the blade and smell of turpentine forever.
Aim for a blank roughly 25–30cm long, 5cm wide and 3–4cm thick. If you can, split it from a log rather than sawing it. Splitting follows the grain, and grain that runs cleanly down the length of the spoon is stronger and far easier to carve. With a sawn blank, check the face before you start: if the grain lines run parallel to the long edges, you are fine. If they run out towards a corner, expect tear-out there and keep your cuts shallow.
Green wood is often free. Ring a tree surgeon, ask a gardener, or keep an eye out after winter storms. Cut blanks seal their ends better if you store them somewhere cool and shaded and use them within a few weeks.
The tools that actually matter
You can spend a fortune on carving kit. You do not need to.
- A straight carving knife. A Sloyd-style blade of 6–8cm does about eighty per cent of the work. Look for a handle that fills your palm and a blade with a flat-ish grind.
- A hook knife. The curved blade that hollows the bowl. Buy one with a tight enough curve for a spoon-sized hollow, not a deep gouge.
- A small saw. A bow saw, a folding pruning saw or a fine tenon saw will cut your blank to length and take the corners off.
- A strop and polishing compound. Not optional. A dull knife needs more force, and more force is how people cut themselves.
- A cut-resistant glove. Wear it on the hand that holds the wood, not the hand that holds the knife.
A small carving axe is a joy for roughing out, but it is a luxury on a first spoon. Spend the money on a decent hook knife instead.
Sharpen by stropping: twenty slow passes each side, edge trailing, every twenty minutes or so of carving. A knife that glides through end grain is sharp. A knife that skids across it is not.
Grips that keep your fingers attached
Carving injuries nearly always come from one of two things: cutting towards yourself, or cutting with the work held at arm's length where you have no control. Two rules cover most of it. Every cut travels away from your body. Every cut is made with a braced wrist, moved from the shoulder, not flicked from the fingers.
The thumb push cut
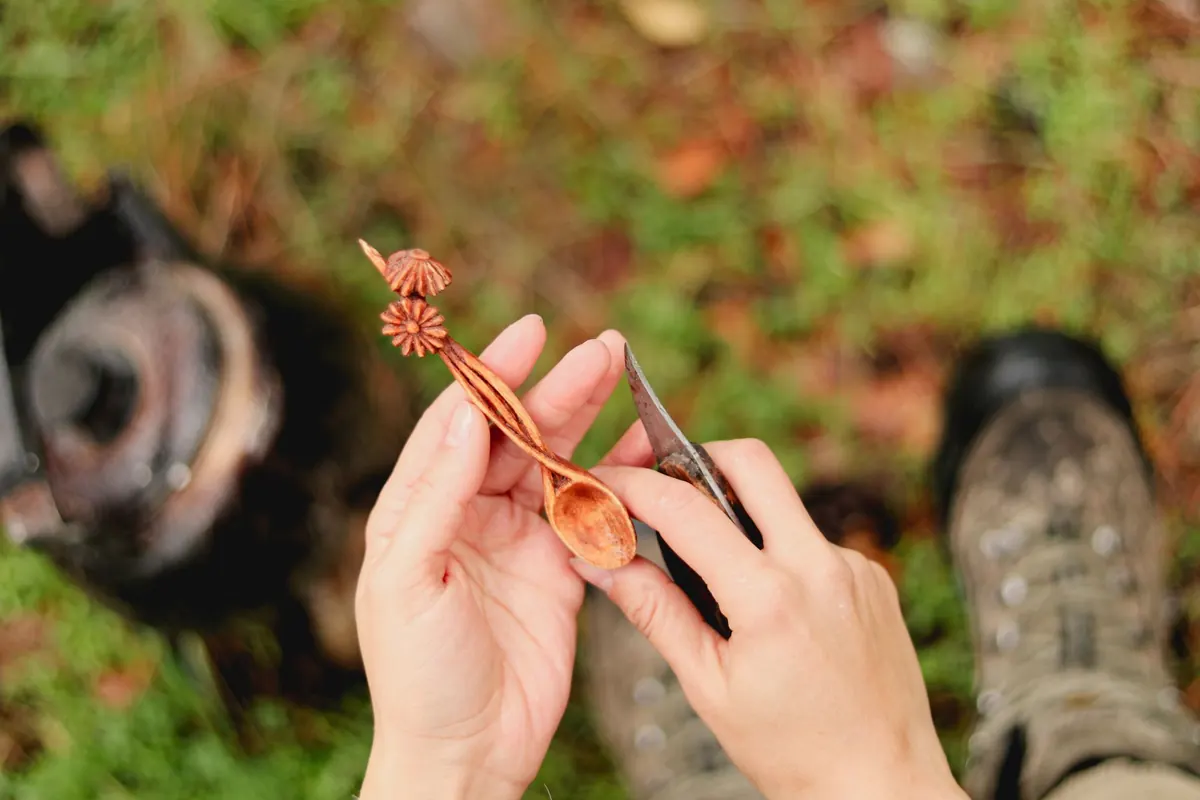
Hold the knife as you would a pencil, blade pointing down, and brace your thumb against the work. Push the blade forward in short, controlled slices. This is your detail cut — neatening the neck of the spoon, tidying the transition where handle meets bowl, and everything within a centimetre of a line you have drawn.
The chest lever
Clamp the blank between your chest and your gloved hand, tuck your elbow into your side, and lock the wrist. Cut by rotating your upper body rather than your hand. It feels odd for the first ten minutes and then it feels like the most controlled cut you have. It is the one to use for long shaping passes down the handle.
Keep the work close. Carving at arm's length gives you no leverage and no accuracy. If you cannot see exactly where the blade will go when it slips, stop, move the wood and start again.
Roughing out the shape
- Draw the spoon on the face of the blank in pencil. A handle about 2cm wide at its narrowest, opening into a bowl roughly 5cm long and 4cm wide is a sensible starting proportion.
- Saw off the corners outside the line. Work down the handle side first, leaving the bowl end chunky: a fat block is easier to hold than a finished bowl.
- Shape the handle with the knife, cutting from the neck of the spoon towards the far end so you are cutting downhill with the grain.
- Round the handle's cross-section gradually — octagon to sixteen-sided to round. Do not chase a perfect cylinder; a slightly faceted handle is more comfortable in the hand anyway.
- Shape the outside of the bowl last, thinning the underside bit by bit and checking the thickness with your fingers as you go.
Hollowing the bowl
Rest the spoon in your lap on a folded cloth or a scrap of leather so it cannot spin. Work the hook knife across the grain, from the ends of the bowl towards the middle, taking shallow scooping passes and rotating the spoon in your hand rather than twisting the knife. Stop when the walls are about 5–8mm thick. If the bowl flexes under your thumb, you are close to going through.
If you are carving green wood, hollow the bowl fairly early so the spoon dries evenly, then leave it to settle before finishing.
Sanding and finishing
Green spoons need to dry slowly or they will crack. Put the roughed-out spoon in a paper bag with its own shavings and leave it somewhere cool for a fortnight. Dried timber can go straight to finishing.
Work through 120, 180 and then 240 grit, sanding with the grain and using a dowel wrapped in paper for the bowl. Many carvers stop sanding altogether and leave the faceted knife finish showing — it looks good and it feels better in the hand than a fuzzy sanded surface. If you do want it smooth, wipe the spoon with a damp cloth, let it dry, then sand again lightly at the same grit. That raises the grain so the fibres you knock off now will not stand up later.
For a finish, use a food-safe drying oil: raw linseed sold for the purpose, pure tung oil, or a beeswax-and-oil blend. Apply thin coats, leave for twenty minutes, wipe off the excess and let it cure. Avoid olive oil and cooking oils — they never set and eventually turn rancid. If you are making a spoon for someone with a nut allergy, choose a non-nut oil and check the tin says food-safe. Wash the finished spoon by hand and do not leave it soaking; re-oil it when the surface starts to look dry.
Keep the first one
The first spoon will be thicker than you intended and slightly asymmetric. Keep it, use it, and note the two things you would change. The second spoon takes half the time, and the fifth takes an afternoon including the oiling. If you only take one habit away from this, make it the strop: a sharp knife is a safe knife, and a few passes on leather before you start is the difference between carving and wrestling.
Photo: Golboo Maghooli / Pexels
Related posts
More stories you’ll love reading